Bake Thomas Keller's Pineapple Upside Down Cake: Cast Iron vs. Silicone Showdown
The aroma of a freshly baked cake wafting through the house in the early hours is one of life's simple, yet profound, pleasures. For many home bakers, a quiet morning offers the perfect opportunity to indulge in a culinary project. And when beautiful, ripe golden pineapples are on sale, what better inspiration could there be than the classic, sunny pineapple upside down cake?
While countless recipes exist for this beloved dessert, one name has consistently surfaced in recent years, captivating the attention of bakers worldwide: Thomas Keller. The esteemed chef, renowned for his precision and perfection, brings his signature touch to this humble treat. His version has graced countless food blogs, inspiring a new wave of pineapple upside down cake enthusiasts. But Keller's recipe comes with a specific instruction that sparks a debate among bakers: is it truly better to use a silicone cake pan over the traditional cast iron skillet?
The Allure of Thomas Keller's Pineapple Upside Down Cake
Thomas Keller's approach to even the most comforting classics is to elevate them through thoughtful technique and impeccable ingredients. His pineapple upside down cake is no exception. It promises not just a cake, but an experience – a perfectly balanced symphony of tangy pineapple, rich, buttery caramel, and a tender, moist crumb. The magic often begins with the "Pan Schmear," a luscious base that creates the signature caramelized topping.
Unlike some recipes that might rely on simple melted butter and brown sugar, Keller's schmear is a carefully crafted blend of unsalted butter, honey, dark rum (though easily substituted for a family-friendly version), packed light brown sugar, and a hint of vanilla paste or extract, finished with a whisper of sea salt. This rich mixture isn't just a topping; it's the heart of the cake's flavor, providing a complex, deeply caramelized crust that perfectly complements the fruit. The use of premium ingredients, like gold (extra-sweet) pineapple, further ensures a superior result. It's this dedication to detail that makes Keller's version a true standout, tempting even seasoned bakers to try their hand at his exacting standards.
Cast Iron vs. Silicone: The Ultimate Bake-Off
The choice of bakeware is often a matter of personal preference, but in the realm of pineapple upside down cake, it can significantly impact the final outcome. Thomas Keller's recipe specifically calls for a 9-inch silicone cake pan, a modern choice that diverges from the cast iron tradition. This specification isn't arbitrary; it addresses a common point of anxiety for many bakers: the dreaded inversion.
Silicone's Advantage: The Easy Flip
For those who feel a pang of dread at the thought of tipping a cake, dripping with molten hot caramel, out of a heavy cast iron pan, silicone offers a comforting alternative. Its flexible, non-stick nature makes releasing the cake significantly easier. There's less risk of the delicate caramel and pineapple tearing or sticking to the sides, leading to a pristine presentation with minimal effort. The ease of handling and the reduced anxiety during the critical flipping moment are major drawcards for the silicone camp. It allows the baker to focus purely on the recipe, confident that the cake will emerge beautifully intact.
Cast Iron's Charm: A Traditional Crisp
Despite Keller's silicone preference, many home bakers remain fiercely loyal to their cast iron skillets for pineapple upside down cake. And for good reason. Cast iron is a champion of even heat distribution, which can lead to a more consistent and deeply caramelized bottom (which becomes the top!). The higher heat retention of cast iron often results in a slightly crispier, more defined caramel crust that some find irresistible. There's also a nostalgic, rustic charm associated with baking in a well-seasoned cast iron skillet – a connection to generations of home baking.
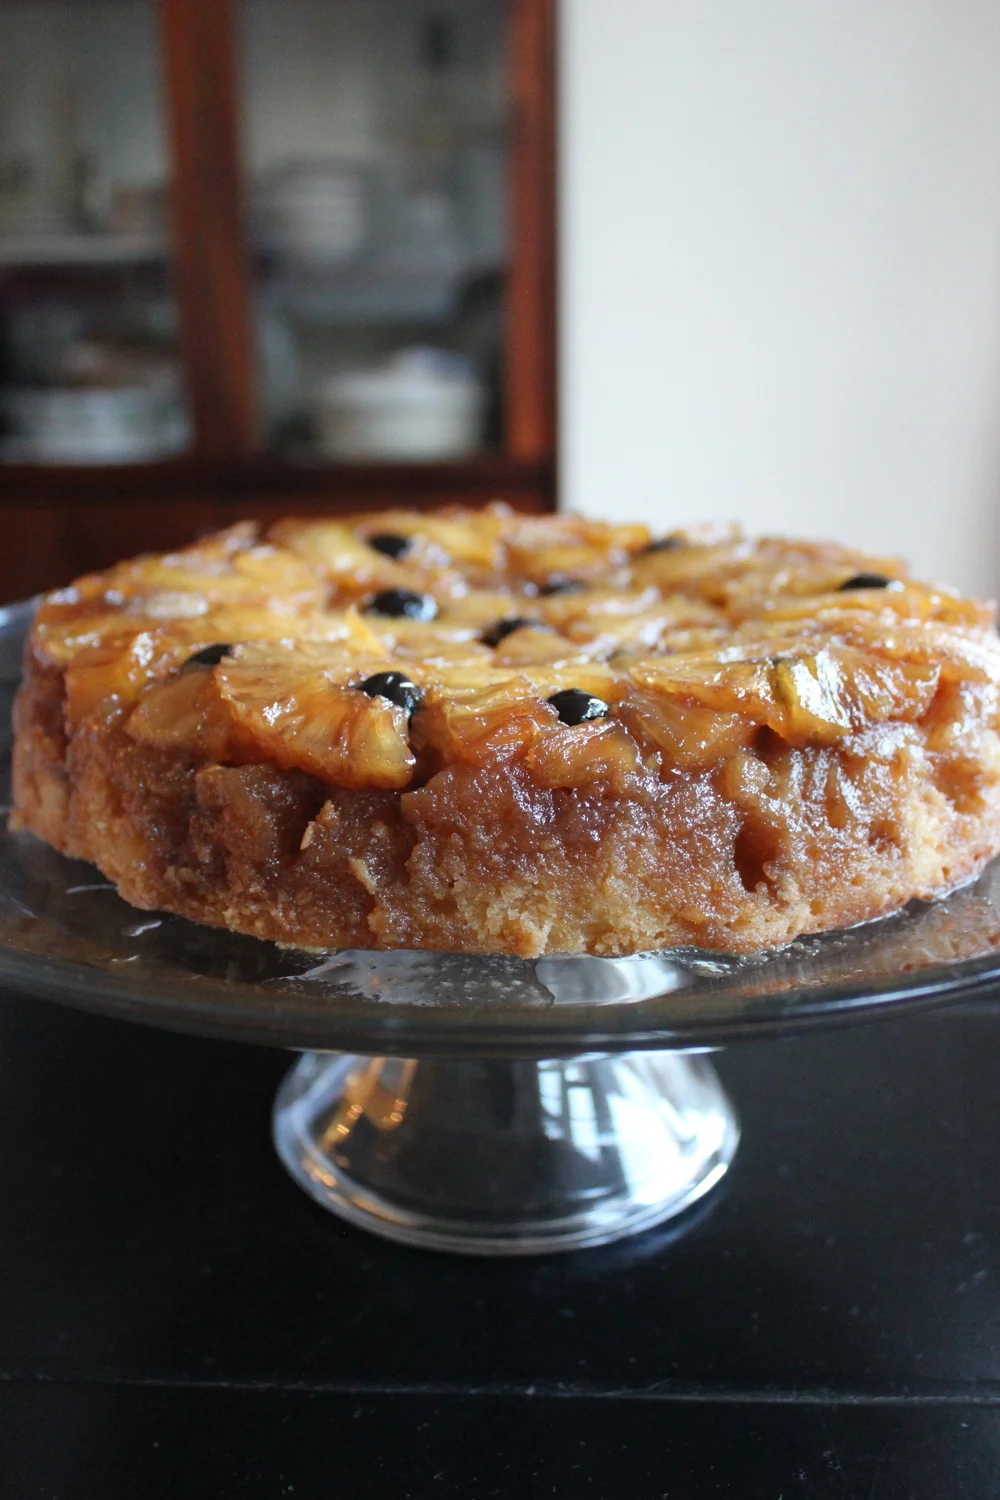
One baker, following Keller's recipe almost to the letter (except for swapping rum for extra vanilla in the schmear), decided to brave the cast iron route despite the silicone recommendation. The result? A warm, delicious cake enjoyed with coffee, suggesting that while silicone may be easier, cast iron certainly isn't a deal-breaker if handled correctly.
Our Analysis and Tips for Each Pan Type:
- For Silicone Users: While release is easier, silicone doesn't conduct heat as intensely as metal. Ensure your oven is fully preheated and consider adding a baking sheet underneath for stability and slightly better heat transfer to the base. Always allow the cake to cool for 10-15 minutes before attempting the flip; too hot, and the caramel might still be too fluid, too cold, and it might set too firmly to release perfectly.
- For Cast Iron Enthusiasts: To ensure a successful release, proper seasoning and a good coat of butter (or the schmear itself) are paramount. Some bakers even line the bottom with a circle of parchment paper after applying the schmear, then arrange the pineapple on top. This provides an extra layer of non-stick insurance. Again, the cooling period is crucial. Wait about 15-20 minutes for the caramel to set slightly but remain pliable enough to release. If you wait too long, the caramel can harden and stick. A quick run of a thin knife around the edge can help before inverting onto a serving plate.
Decoding Keller's "Schmear" and Cake Batter
The genius of Keller's pineapple upside down cake isn't just in the pan choice, but in the meticulous formulation of its components. Let's break down the key elements:
The Pan Schmear: A Flavor Foundation
As mentioned, this isn't your average caramel base. The combination of room temperature unsalted butter, honey, light brown sugar, and vanilla creates a deeply flavorful, rich foundation. The optional dark rum adds a sophisticated note, but an extra touch of vanilla or even a splash of pineapple juice can be used as a substitute without compromising flavor. The hint of sea salt is critical; it balances the sweetness, elevating the entire experience. Spreading 1/3 cup of this rich schmear over the pan's bottom sets the stage for a spectacular caramelized top.
The Pineapple Arrangement: Artful Presentation
Keller's recipe emphasizes using a gold (extra-sweet) pineapple, ensuring optimal flavor. The method for cutting and arranging the pineapple slices is also precise: quartering the pineapple, removing the core, and then slicing crosswise into ¼-inch thick pieces. The overlapping rings, starting from the perimeter and working inwards, not only look beautiful but also ensure every bite of cake has a generous portion of fruit.
The Cake Batter: Tender and Balanced
The cake itself is designed to be moist and tender, a perfect counterpoint to the rich topping. It calls for cake flour, which, with its lower protein content, yields a finer, softer crumb than all-purpose flour. The addition of baking powder ensures a good lift. The creaming method, combining room temperature butter and granulated sugar until light and creamy, incorporates air for a tender texture. Vanilla, eggs, and a touch of milk complete a balanced batter that bakes up beautifully, creating a perfect canvas for the caramelized pineapple.
Beyond the Recipe: Tips for Pineapple Upside Down Cake Perfection
While Keller's recipe provides an excellent blueprint, a few universal tips can elevate any pineapple upside down cake:
- Ingredient Quality Matters: Always opt for fresh, ripe pineapple. The "gold" or "extra-sweet" varieties are often best. Use high-quality butter and pure vanilla extract for the best flavor.
- Room Temperature is Key: For both butter and eggs in the cake batter, ensuring they are at room temperature allows them to emulsify better, creating a smoother batter and a more uniform texture.
- Don't Skimp on the Schmear: Resist the urge to spread the schmear too thinly. A generous layer ensures a rich, luscious caramel topping.
- The Perfect Flip: As discussed, the timing of the flip is crucial. Too soon, and the hot caramel can splash or run; too late, and it may solidify and stick. Aim for 10-20 minutes after removing from the oven, depending on your pan material. Place your serving plate upside down over the pan, then confidently invert them together.
- Individual Portions: For a delightful variation, consider making mini pineapple upside down cakes! They're perfect for individual servings and can even be made in an air fryer for a quick treat. Learn how to make them with our guide: Quick Mini Pineapple Upside Down Cakes in Your Air Fryer.
Troubleshooting Common Pineapple Upside Down Cake Challenges
Even with the best intentions, baking can sometimes present a few hurdles. Here are common issues and how to overcome them:
- Cake Sticking to the Pan: This is often due to insufficient greasing/schmear, waiting too long to invert, or an improperly seasoned cast iron pan. Ensure a generous layer of schmear, and try a parchment paper circle on the bottom of cast iron pans. Invert within the recommended cooling window.
- Caramel Overflows or Burns: Too much schmear for the pan size can cause overflow. Ensure your pan has sufficient depth. If the caramel burns, your oven might be running hot, or the cake baked for too long. An oven thermometer can help verify accuracy.
- Cake is Dry: Overmixing the batter can develop too much gluten, leading to a tough, dry cake. Mix just until combined. Also, overbaking can dry out any cake; check for doneness using a skewer or toothpick inserted into the center (it should come out clean).
- Pineapple Not Fully Cooked/Soft: Ensure your pineapple slices are ¼-inch thick or slightly less. Thicker slices may not soften sufficiently during the bake time.
Whether you choose the modern flexibility of silicone or the traditional charm of cast iron, baking Thomas Keller's pineapple upside down cake is a rewarding experience. It’s a testament to the fact that even classic comfort foods can be elevated through thoughtful technique and quality ingredients. The specific pan choice becomes less about right or wrong, and more about personal comfort and desired outcome. So, embrace the early morning baking ritual, select your pan, and enjoy the process of creating a truly spectacular dessert that delights both the eyes and the palate.
